Showing posts with label Desserts. Show all posts

Monday, June 29, 2009

Peanut Butter Granola Bars


Yum! Homemade granola bars! I actually made these for Dad--who loves anything that has peanut butter, raisins, oatmeal, and chocolate chips. So easy to put together and delicious! Adjust the ingredients and sweetness to your taste--endless combinations. :)

Granola Bars
Rose's recipes

1 to 1 1/2 cups peanut butter (I used white chocolate wonderful today)
1/4 c brown sugar
1/2 c honey (or to taste)
1/4 c oil
2 t vanilla
2 1/2 to 3 cups oats
1/2 c Cheerios
1/2 c coconut
1/2 sunflower seeds
1/4 c raisins
1/2 c chocolate chips

Preheat oven to 350 degrees.
Mix wet ingredients in large bowl.
Add rest of ingredients or add-ins of your choice.
Pour mixture into 9x13 pan sprayed with cooking spray, compacting down to even out.
Bake for 20-25 minutes.
Remove from oven; score with slices with knife; allow to cool fully; cut and serve.

Continue......

Tuesday, March 24, 2009

Graham Cracker Eclair


This recipe came from my mom. It requires no baking, it makes a large pan, and is very simple to make. And it tastes really comforting. The layers of graham crackers soften and melt in your mouth between the layers of pudding and the chocolate glaze adds a smores-like quality. I know, cool whip and instant pudding mix aren't exactly the most healthful ingredients, but this just tastes good. My mom usually adds slices of bananas also, which is great too. This is excellent to make ahead of time because it tastes better after several days of graham cracker softening. Enjoy! Continue for recipe.

Graham Cracker Eclair
from Mom

Filling:
Whole graham crackers
large vanilla instant pudding mix
8oz cool whip

Glaze:
3 T melted butter
2 T cocoa powder
1 1/2 cup powdered sugar
2 t karo light corn syrup
2 t vanilla
3 T milk

9x13 ungreased glass dish

Layer the bottom of your dish with whole graham crackers.
For the filling, make the pudding according to the instructions on the box. Fold in the cool whip.
Pour 1/2 the filling over the graham crackers. Top with another layer of crackers.
Add rest of filling.
Top with another layer of crackers.
For the glaze, mix butter and cocoa. Add rest of ingredients and stir.
Spread glaze over the top evenly.
Chill 12-24 hours.

Continue......

Sunday, February 15, 2009

Chocolate Yogurt Cake


Ok, really?!?!? Another yogurt cake variation?! I just can't help myself! :) They're too easy--perfect for a spur-of-the-moment weeknight treat when I don't have time to fuss around. No mixer! This is practically the only cake that I've made since the birth of my daughter. So simple! Finish with a dusting of powdered sugar or a scoop of ice cream. For a deeper chocolate flavor, melt some bittersweet chocolate and mix into the batter. Yum! Continue for recipe.

Chocolate Yogurt Cake

1/3 cup cocoa
2/3 + 1/2 cup flour
2 t baking powder
pinch of salt
1 cup sugar
1/2 cup plain yogurt
3 eggs
1 t vanilla
1/3-1/2 cup oil

Preheat the oven to 350 degrees Fahrenheit. Grease and flour a 9x2 round cake pan (or use a 8 1/2 x 4 1/2 loaf pan).
Whisk together the flour, cocoa, baking powder and salt.
In another bowl, mix the sugar, yogurt, eggs, and vanilla until well blended.
Add the dry ingredients, mixing until just combined.
Add the oil, and stir until smooth.
Bake for 40-45 minutes, until the cake is springy to the touch and a toothpick inserted into the center comes out clean.
Cool cake on a rack for about 20 minutes; then turn it out of the pan to cool completely.

Continue......

Thursday, October 2, 2008

Fabulous Banana Cookies

These are the BEST cookies!! I absolutely love them!! They are banana bread cookies--yum!! The banana really comes through in these cakey, moist treats that have a hint of cinnamon, cloves, and nutmeg. Make them with nuts, chocolate chips, or both (I like chips myself). I'm always looking for great ways to use my browning bananas. Thanks Simply Recipes for posting these cookies from Garrett McCord of Vanilla and Garlic!! Continue for recipe.

Banana Cookies Recipe

1/2 cup of unsalted butter, room temperature
1 cup of sugar
1 egg, room temperature
1 cup of mashed bananas (about 2 ½ large bananas)
1 teaspoon of baking soda
2 cups of flour
pinch of salt
1/2 teaspoon of ground cinnamon
pinch of nutmeg (optional)
1/2 teaspoon of ground cloves
1 cup of pecans (walnuts and chocolate chips are fine alternatives)

1 Preheat the oven to 350°F. Cream the butter and sugar together until light and fluffy. Add the egg and continue to beat until the mixture is light and fluffy.

2 In a bowl, mix the mashed bananas and baking soda. Let sit for 2 minutes. The baking soda will react with the acid in the bananas which in turn will give the cookies their lift and rise.

3 Mix the banana mixture into the butter mixture. Mix together the flour, salt, and spices and sift into the butter and banana mixture and mix until just combined.

4 Fold into the batter the pecans or chocolate chips if using. Drop in dollops onto parchment paper-lined baking sheet. Bake for 11-13 minutes or until nicely golden brown. Let cool on wire racks.

Makes about 30 cookies.


Continue......

Chewy Chocolate Chip Cookies


Coming!

Chewy Chocolate Chip Cookies

Continue......

Wednesday, September 10, 2008

Plum Almond Yogurt Cake


Ok, another yogurt cake. I could not help myself. Yum! The plums have been so nice this month and this is a perfect and lovely way to enjoy them. Great for breakfast, snacks, or dessert. I like this variation of yogurt cake to serve to guests--the overlapping plums on the top are so beautiful and look fancy, although it still is so simple to put together. Be sure to really pack in the plums on the top. Umm--I want a latte and slice right now! Continue for recipe.


Yogurt Cake

1 1/2 cups unbleached all-purpose flour
2 tsp. baking powder
pinch of salt
1 cup granulated sugar
1/2 cup plain whole-milk yogurt
3 large eggs
1/2 t vanilla (optional)
1/2 cup canola oil

Variations:

Plum Almond:
1/2 t almond extract + sliced plums--overlap on top (pack them in)
can sub ground almonds for part of the flour if wanted; sprinkle with a little brown sugar

Lemon/Orange Blueberry:
2 tsp. grated lemon/orange zest (from 1-2 lemons/oranges) + 2 cups blueberries tossed in a T of flour

For the glaze:
Juice from 2 lemons/oranges
1/4 cup powdered sugar

Preheat the oven to 350 degrees Fahrenheit. Grease and flour a 9x2 round cake pan (or use a 8 1/2 x 4 1/2 loaf pan).
Whisk together the flour, baking powder and salt.
In another bowl, rub the zest(if using) into the sugar with your fingertips until the sugar is moist and fragrant.
Add the yogurt, eggs, and vanilla to the sugar and mix until well blended.
Add the dry ingredients, mixing until just combined.
Add the oil, and stir until smooth.
Add fruit, if using.
Bake for 40-45 minutes, until the cake is springy to the touch and a toothpick inserted into the center comes out clean.
Cool cake on a rack for about 20 minutes; then turn it out of the pan to cool completely.
When the cake is cooled, combine the lemon juice and powdered sugar in a small bowl and spoon it gently over the cake. The glaze will be thin and will soak in like a syrup.

Continue......

Sunday, August 24, 2008

Orange Blueberry Yogurt Cake


Umm..yogurt cakes are so easy to put together that I keep going to back to this basic recipe. No mixer needed! And very moist and tasty. Today I opted for an orange flavored cake with blueberries. Yum! Continue for recipe.

Yogurt Cake

1 1/2 cups unbleached all-purpose flour
2 tsp. baking powder
pinch of salt
1 cup granulated sugar
1/2 cup plain whole-milk yogurt
3 large eggs
1/2 t vanilla (optional)
1/2 cup canola oil

Variations:

Plum Almond:
1/2 t almond extract + sliced plums--overlap on top (pack them in)
can sub ground almonds for part of the flour if wanted; sprinkle top with brown sugar

Lemon/Orange Blueberry:
2 tsp. grated lemon/orange zest (from 1-2 lemons/oranges)rubbed into the sugar + 2 cups blueberries tossed in a T of flour

For the glaze:
Juice from 2 lemons/oranges
1/4 cup powdered sugar

Preheat the oven to 350 degrees Fahrenheit. Grease and flour a 9x2 round cake pan (or use a 8 1/2 x 4 1/2 loaf pan).
Whisk together the flour, baking powder and salt.
In another bowl, rub the zest(if using) into the sugar with your fingertips until the sugar is moist and fragrant.
Add the yogurt, eggs, and vanilla to the sugar and mix until well blended.
Add the dry ingredients, mixing until just combined.
Add the oil, and stir until smooth.
Add fruit, if using.
Bake for 40-45 minutes, until the cake is springy to the touch and a toothpick inserted into the center comes out clean.
Cool cake on a rack for about 20 minutes; then turn it out of the pan to cool completely.
When the cake is cooled, combine the lemon juice and powdered sugar in a small bowl and spoon it gently over the cake. The glaze will be thin and will soak in like a syrup.

Continue......

Plum


coming!!

Type rest of the post here

Continue......

Monday, August 18, 2008

Oatmeal Raisin Carrot Cookies


Ok, I know I just made carrot raisin muffins, but I really wanted a chewy raisin spice cookie today and I noticed this recipe on Baking Bites that sounded good. I made several modifications--used oil instead of butter and added applesauce for some of the fat. I also cut out the mixer, combining the ingredients by hand like a quick bread. I also used old-fashioned oats, pulsed briefly in my mini-chopper, as opposed to the quick variety.


The cookies are lovely looking and I really like the cakey consistency. Like many spice cakes, they are definitely better the second and third days. So plan ahead, and make these the day before--giving the spices time to develop. They are only slightly sweet and have a nice texture from the oatmeal. Great breakfast cookies. When I make them again, I will up the spices a bit and add a touch more sugar (if I'm wanting a "cookie" not a breakfast treat). Half brown sugar might be nice as well. These grew on me each day that I ate them and by the time they were gone, I was ready to make another batch! Continue for recipe.

Oatmeal Raisin Carrot Cookies


1 1/2 cups all purpose flour
1 tsp baking soda
1/2 tsp salt
1/4 cup oil
1/4 cup applesauce (generous)
3/4 cup sugar
1 large egg
1 tsp vanilla extract
1/2 tsp ground cinnamon
1/2 tsp pumpkin pie spice
1 cup grated carrots
1 cup oats
1 cup raisins

Preheat oven to 350F. Line a baking sheet with parchment paper.
In a small bowl, whisk together flour, baking soda and salt.
In a large bowl, mix together oil, applesauce, sugar, egg, vanilla and spices.
Stir in flour mixture. Once no streaks of flour remain, stir in carrots, oats and raisins.
Drop tablespoonfuls of batter onto prepared baking sheets.
Bake for 11-13 minutes, until cookies are set and lightly browned on the edges. Cool for 3 or 4 minutes on the baking sheets, then transfer to a wire rack to cool completely.

Makes about 2 dozen cookies.

Continue......

Tuesday, June 24, 2008

Mixed Berry Cobbler: Tuesday's with Dorie


Today's recipe from Baking: From My Home to Your's, was a simple fruit cobbler--nothing fancy, just nice berries topped with a homey biscuit crust. Very comforting and easy. The lemon zest gave the berry filling a nice freshness and the plain topping was perfect to sop up all of the juices and let the fruit be the star. Not too sweet, this will be good for my breakfast tomorrow!

I did change this recipe just a bit. I cut it down by 1/3 and added 2 cups of mixed berries and peaches (more than the recipe called for but I definitely wouldn't want less). I also added a dash of cinnamon to the fruit and used buttermilk instead of the heavy cream in the topping. Instead of rolling out the dough, after mixing it with my hands, I globbed it on top of the fruit and spread it out to cover, giving it a more rustic feel. I was also scant with the sugar in the filling. Nice recipe! It would be just perfect with Blue Bell's new summer flavor, Blackberry Cobbler ice cream--yum!


Continue......

Monday, June 16, 2008

Tuesday's with Dorie Rewind: Bill's Big Carrot Cake


It's Tuesday again and that means another recipe from Baking: From My Home to Yours! This week, the selection was a delicious looking peppermint puff ring. As you can tell by my photo, I was side-tracked by a previous recipe. And I noticed that it is acceptable to make past recipe trials, so I decided I just had to make a carrot cake for Father's Day. I'll have to get back to the yummy looking puff another time soon!

This is a big, beautiful looking carrot cake, filled with nuts, coconut, and raisins. The three layers are very moist and bake nicely and it certainly makes for an impressive presentation. It was good, but definitely not my favorite carrot cake. I guess I was wanting something spicier. As this cake only contains cinnamon, it didn't quite taste like a spice cake. And I'm not a fan of all of the coconut. If I were it make it again, I would add spices, omit the coconut, and increase the amount of raisins. That being said, it was still a very good cake.


But I absolutely LOVE the icing!! In fact, the icing took over the cake--yum! I could eat a bowl of this stuff! It's just a simple mixture of cream cheese, butter, powdered sugar, and lemon extract--but it is terrific! I will definitely be featuring this lemon icing on many sweets to come! It would be wonderful on cinnamon rolls, or chocolate cake, or.....Yum!
Type rest of the post here

Continue......

Tuesday, June 3, 2008

French Chocolate Brownies: Tuesdays with Dorie


My first recipe with the group Tuesdays with Dorie! Wonderful! This group is going through Dorie Greenspan's fabulous book, Baking From My Home to Yours, one recipe at a time, posting each Tuesday. I was so excited to join up, as I really enjoy this cookbook--Yummy!!

These brownies are really tasty. But I'm not sure if I would necessarily call them brownies--they're so smooth and soft--velvety, yet not a cake either. Wonderful!! They are made with bittersweet chocolate and have an intense flavor. They aren't fudgy or cake-like, maybe somewhere in between. They have a very tender, soft texture. The top crusts over while baking and then cracks, making them rather delicate and crumbly, adding to their charm. The secret ingredient is raisins (supposed to be rum-soaked, but I left this out) and they're very subtle--great with the chocolate. They really add a great dimension. Very nice! I love these!!


Continue for brownie recipe.

French Chocolate Brownies

adapted from Baking From My Home to Yours

1/2 cup all-purpose flour
1/8 teaspoon salt
1/8 teaspoon cinnamon
1/3 cup raisins, dark or golden
1 1/2 tablespoons water
1 1/2 tablespoons dark rum (I left this out)
6 ounces bittersweet chocolate, finely chopped
1 1/2 sticks (12 tablespoons) unsalted butter, at room temperature and cut into 12 pieces
3 large eggs, at room temperature
1 cup sugar

Center a rack in the oven and preheat the oven to 300°F.
Line an 8-inch square baking pan with foil, butter the foil, place the pan on a baking sheet, and set aside.
Whisk together the flour, salt and cinnamon.
Put the raisins in a small saucepan with the water, bring to a boil over medium hea,t and cook until the water almost evaporates. Add the rum, let it warm for about 30 seconds, turn off the heat, stand back and ignite the rum. Allow the flames to die down, and set the raisins aside until needed.
Put the chocolate in a heatproof bowl and set the bowl over a saucepan of simmering water. Slowly and gently melt the chocolate, stirring occasionally. Remove the bowl from the saucepan and add the butter, stirring so that it melts. It's important that the chocolate and butter not get very hot. However, if the butter is not melting, you can put the bowl back over the still-hot water for a minute. If you've got a couple of little bits of unmelted butter, leave them—it's better to have a few bits than to overheat the whole. (I carefully melted mine in the microwave and it worked fine--medium power).
Set the chocolate aside for the moment.
Working with a stand mixer with the whisk attachment, or with a hand mixer in a large bowl, beat the eggs and sugar until they are thick and pale, about 2 minutes.
Lower the mixer speed and pour in the chocolate-butter, mixing only until it is incorporated—you'll have a thick, creamy batter.
Add the dry ingredients and mix at low speed for about 30 seconds—the dry ingredients won't be completely incorporated and that's fine.
Finish folding in the dry ingredients by hand with a rubber spatula, then fold in the raisins along with any liquid remaining in the pan.
Scrape the batter into the pan and bake 50 to 60 minutes, or until the top is dry and crackled and a knife inserted into the center of the cake comes out clean.
Transfer the pan to a rack and allow the brownies to cool to warm or room temperature.
Carefully lift the brownies out of the pan, using the foil edges as handles, and transfer to a cutting board. With a long-bladed knife, cut the brownies into 16 squares, each roughly 2 inches on a side, taking care not to cut through the foil.

Dorie's Serving Suggestions: The brownies are good just warm or at room temperature; they're even fine cold. I like these with a little something on top or alongside—good go-alongs are whipped crème fraiche or whipped cream, ice cream or chocolate sauce or even all three!

Storing: Wrapped well, these can be kept at room temperature for up to 3 days or frozen for up to 2 months.

Continue......

Monday, May 26, 2008

Blackout Cake


Type your summary here

Type rest of the post here

Continue......

Saturday, November 17, 2007

Low-Fat Fudgy Brownies


And finally the recipe! These were really tasty, chocolaty brownies--and low fat! Of course ice cream tops them off wonderfully. :)

Fudgy Low-Fat Brownies
America's Test Kitchen

3/4 cup all-purpose flour
1/3 cup Dutch-processed cocoa powder
1/2 t baking powder
1/4 t salt
2 oz bittersweet chocolate, chopped
2 T unsalted butter
2 T low-fat sour cream
1 T chocolate syrup
2 t vanilla
1 egg
1 egg white
1 cup sugar

Adjust oven rack to middle position and preheat to 350.
Fold 2, 12-inch pieces foil lengthwise so each measures 7 inches wide. Fit sheets into 8-inch square pan, pushing foil into corners and up sides of pan (to help remove brownies--optional).
Spray foil or pan with cooking spray.
Whisk dry ingredients together.
Melt bittersweet chocolate and butter in large bowl until smooth. Cool several minutes, then whisk in sour cream, syrup, vanilla, eggs, and sugar.
fold in dry ingredients until combined.
Pour batter into pan. Bake until slightly puffed and toothpick inserted in center comes out with a few sticky crumbs attached, 20-25 min.
Cool completely on wire rack.

Continue......

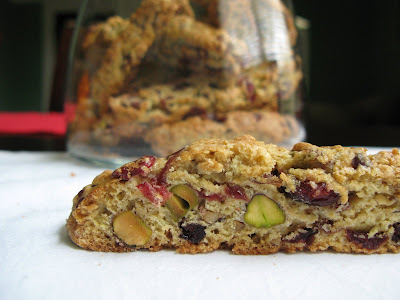
Cranberry Pistachio Biscotti


Coming soon!

Type rest of the post here

Continue......

Friday, November 16, 2007

Alsatian Apple Tart


Coming soon!

Type rest of the post here

Continue......

Wednesday, October 17, 2007

Coconut "Twinkie" Cupcakes with Lemon Filling


My love affair with Asian desserts and pastries started last year during a vacation to SanFrancisco. I just couldn't get enough of the delicious Chinese bakeries, with my favorite steamed red bean buns. Sponge cakes, almond cookies, egg custard tarts, filled buns, moon cakes...Yum!! Upon returning home, I was excited to try some of the local bakeries. And although I haven't yet found the perfect steamed bun, Houston has a large Asian community and many options for wonderful sweets. What a great benefit of living in a large, multi-cultural city!


Anyway, I was very excited to try my first recipe for a friend's birthday from The Sweet Spot: Asian Inspired Desserts by Pichet Ong and Genevieve Ko. This cookbook has beautiful looking sweets! These cupcakes were great--light and airy, with a subtle crunch from the coconut and a tart lemon curd filling. I only piped a small amount of the curd into the cupcakes, about a tablespoon or less, and it was perfect. I topped them with a dollop of sweetened whipped cream, hiding the hole for the filling. Cute! You will hear from this cookbook again! Continue for Cupcake recipe.

Coconut Twinkie Cupcakes with Lemon Filling
from The Sweet Spot, Asian-Inspired Desserts

Lemon Filling

1/2 cup fresh lemon juice
2 T unsalted butter, at room temperature
1/2 cup heavy whipping cream
1/2 cup sugar
3 large egg yolks
2 t vanilla extract (or 1 vanilla bean)
1/2 t salt

Coconut Cupcakes

1 T unsalted butter, at room temperature, for greasing ramekins
1/2 cup sugar, plus more for sugaring ramekins
1/2 cup all-purpose flour
1/2 cup finely shredded unsweetened dried coconut
3 large eggs, separated, at room temperature
1 large egg yolk, at room temperature
1 T grated lemon zest
1/4 t salt
1 t vanilla extract

To make Filling:

  • Put all ingredients in a double boiler or in bowl set over a saucepan of barely simmering water. Whisk constantly until the mixture becomes very thick, like jam, about 15 min. (Mine took quite a bit longer for some reason).
  • Remove from heat, put a piece of plastic wrap directly on the surface of the curd, and refriegerate until completely chilled, about 2 hours.
For the Cupcakes:

  • Preheat oven to 350 degrees. Generously butter and sugar 12 4oz. ramekins or a 12-cup muffin tin; set aside.
  • Sift the flour into a large mixing bowl and stir in the coconut; set aside.
  • Put the egg whites in the bowl of an electric mixer and whisk at medium-high speed until frothy. With the machine running, slowly add 1/3 cup of the sugar and continue whisking until medium-soft peaks form. Transfer to another large bowl.
  • Put the egg yolks and zest in the mixer bowl and whisk at medium speed until the yolks break, then add the salt and the remaining 2 T plus 2 t sugar and continue whisking until the yolks are pale yellow, thick, and doubled in volume, about 10 minutes.
  • Add the vanilla to the yolk mixture and whisk until well incorporated. Add 1/3 of the whipped whites to the yolks and stir well. Carefully fold in the remaining whites just until incorporated, trying to make sure they do not lose volume. Fold in half the flour mixture, then fold in the remaining flour until no traces of flour remain.
  • Divide the batter among the ramekins or muffin cups. If using ramekins, put them on a baking sheet. Bake for 4 minutes, then rotate the pan and bake until a tester comes out clean and the tops are puffed and golden brown, about 5 minutes more. Remove from the oven and cool for 5 minutes in the pan, then unmold and cool completely on a rack. The cake will deflate as they cool.
  • Transfer the chilled lemon filling to a pastry bag filled with a small plain tip. Poke a hole in the top of each cupcake with the tip, and slowly pipe in the curd until it begins to squirt out the opening. You will be able to feel when the cupcake is filled.
  • Serve the same day.


  • Continue......

    Sunday, October 7, 2007

    Greta's Apple Torte


    Last week I visited my dear friend Greta and her 2 little ones in Indiana. There is just something about old friends that's so wonderful and comfortable! She is such a great mom--it was so fun to see her with her family. She is a wonderfully creative person and so great in the kitchen--making tasty desserts and meals for us in college. She always had some fun treat for us to try or biscotti waiting for company. Her countless gifts of food and handmade cards are so special to me and really exemplify what a blessing food can be to others. The time and work put into making these goodies demonstrate her thoughtfulness and love for her friends. When I think about my home, I hope that is as welcoming and comforting as Greta's. Love you so Greta!

    For my visit, Greta made this terrific apple torte. It was really good and I had to make it when I got home. And it's so easy and fun to make! A buttery, shortbread-like cake batter is spread on the bottom of a pan, stuffed with standing apple slices, dusted with cinnamon, and then baked. After an hour, a custardy mixture of eggs, butter, and sugar is poured over the top and it continues to bake until golden and set. Yum! The smell is fabulous and the resulting torte is gorgeous. Thanks friend!! Continue for Greta's Apple Torte recipe.

    Greta's Apple Torte

    ¾ cup salted butter (or add 1 t salt if using unsalted)
    2 c. sugar
    4 eggs
    2 t baking powder
    8 small apples, peeled, cut into 8ths
    cinnamon

    8-9 inch springform pan (or 9 inch cake pan with at least 2 inch sides)

    Preheat oven to 350 degrees.
    Melt ½ cup margarine.
    Add 1 cup sugar and beat well.
    Stir in 2 eggs and mix.
    Add 1 ¾ cup flour and baking powder (and salt if using unsalted butter); beat well.
    Spread in bottom of pan.

    Stand apple wedges in batter and sprinkle with cinnamon.


    Bake for 1 hour.
    Cream remaining butter and sugar (and a small pinch of salt if using unsalted butter). Add eggs.
    Pour over torte.
    Bake 30 min. longer.
    Allow to cool at least 15 minutes before cutting.
    Enjoy!!

    Continue......

    Tuesday, September 25, 2007

    SHF #35: X Shaped Fig Cookies


    Figs are the theme of this month's Sugar High Friday blog event, hosted by Ivonne from the lovely Cream Puffs in Venice. Great selection! I was excited because I have to admit, I've never baked with figs. So this was a treat--using a new ingredient for me. I had planned to go a local orchard and pick fresh figs, but I ran out of time and missed them for this year. So I chose these X shaped cookies from Baking with Julia.

    These treats are a beautiful version of the classic fig newton. The filling combines figs, golden raisins, almonds, orange, chocolate, cinnamon, and rum--a wonderful combination when blended together. The soft dough is easy to work with and both the filling and dough are made in the food processor--easy! The assembly does take a bit of time but the rolled result is an enticing cross shaped cookie with a sweet figgy filling exposed on the inside. Nice! Perfect for an afternoon snack or with coffee for breakfast. A great first recipe using figs! Continue for X cookie recipe.

    X Shaped Fig Cookies
    adapted from Nick Malgieri, in Baking with Julia


    The Dough

    4 cups all-purpose flour
    2/3 cup sugar
    1 t baking powder
    1 t salt
    2 sticks cold, unsalted butter, cut into 12 pieces
    4 eggs

    Put the dry ingredients in the bowl of a food processor fitted with the metal blade; pulse just to mix.
    Add the butter pieces to the bowl and pulse 15-20 times to cut the butter in.
    Add the eggs and pulse until the dough forms a ball on the blade.
    Remove the dough and knead it briefly on a lightly floured counter until smooth.
    Shape the dough into a log and wrap it in plastic wrap; set aside while making the filling.
    (Don't clean processor--use it to make filling.)

    The Filling

    One 12 oz package dried Calimyrna or Mission figs (I used a 9 oz bag)
    1/2 cup unblanched almonds, toasted
    1/3 cup apricot preserves
    1/4 cup plump golden raisins (I used about 1/2 cup)
    1/4 cup candied orange peel, diced (I didn't have this and used zest, juice, and pulp from 1 orange)
    2 oz semisweet chocolate, chopped
    1/4 cup dark rum (I didn't have this--used 1/2 t rum extract)
    1/2 t cinnamon

    1 egg beaten with a pinch of salt, for egg wash
    Confectioner's sugar, for dusting

    Remove stems from the figs and cut the figs into medium-size dice. (Figs and raisins should be moist; if not, plump them with boiling water before using.)
    Put all filling ingredients into the bowl of the food processor and pulse with the metal balde until the mixture is finely chopped.
    Scrape the filling onto a piece of plastic wrap or wax paper. Shape it into a rough log; divide into 12 pieces.
    Position oven racks to divide the oven into thirds and preheat to 350 degrees.
    Line 2 baking sheets with parchment and set aside.

    Assembly:
    Divide the dough into 12 pieces. Working with one at a time, on a lightly floured counter, roll the dough under your hands to form an 8-10 inch rope. Pat it out into a 3 x 8 or 10 inch rectangle.
    Run a spatula under the dough to make certain it hasn't stuck to the surface.
    Brush the top of the dough with the egg wash.
    Roll a piece of filling to the same length as the dough; place it in the center of the dough.
    Pull the dough up around the filling,k making a seam, and roll it into a cylinder, lengthening the dough a little as you roll.
    Cut the roll into 2 or 3 inch pieces.
    Place a cut piece of dough vertically in front of you, seam side down, and make two 1-inch long cuts, one from the bottom, the other from the top, toward the center.
    Use your fingers to separate the slashes and create an X-shaped cookies.
    Transfer the cookies to the prepared pans and repeat with remaining portions of dough and filling.

    Baking:
    Bake cookies for 15-20 minutes, or until just slightly browned, in 2 batches. Transfer to racks to cool.
    Before serving, sprinkle with confectioner's sugar.


    Continue......

    Sunday, September 16, 2007

    Mini Chocolate Cupcakes


    You would never know that these moist, chocolaty cupcake bites are so low in fat--no butter or oils! The secret? Pureed dates. I love these! Dutch-process cocoa and bittersweet chocolate give them an intense flavor and you don't even realize you're missing out on butter. The dates are boiled and pureed in the food processor. The entire recipe is made in the food processor, and is a snap to make. They're lovely topped with a dollop of whipped cream and a strawberry! Enjoy! Continue for Mini Chocolate Cupcakes recipe.

    Mini Chocolate Cupcakes
    Gourmet, August 2003

    Makes 12 mini cupcakes (double recipe to make 24)

    1/3 cup water
    1/3 cup pitted dates, coarsely chopped
    1/4 cup unsweetened Dutch-process cocoa powder
    1 oz fine-quality bittersweet chocolate (not unsweetened), coarsely chopped
    3 tablespoons packed light brown sugar
    1 large egg
    1/4 teaspoon vanilla
    1/4 teaspoon baking soda
    2 tablespoons all-purpose flour

    1 teaspoon confectioners sugar for dusting

    1. Special equipment: a mini-muffin pan with 12 (1/8-cup) muffin cups, preferably nonstick

    2. Preheat oven to 325°F.

    3. Bring water and dates just to a boil in a 1-quart heavy saucepan, then transfer mixture to a food processor and add cocoa powder and chocolate, pulsing once to combine.

    4. Let cool 2 minutes, then add brown sugar, egg, vanilla, baking soda, and a pinch of salt, then purée until smooth. Add flour and pulse just until incorporated.

    5. Spray muffin cups with cooking spray. (If pan is not nonstick, line sprayed bottoms with rounds of wax paper, then spray paper.)

    6. Spoon batter into cups, dividing it evenly, and bake in middle of oven until a wooden pick or skewer comes out clean, 18 to 22 minutes.

    7. Cool cupcakes in pan on a rack 10 minutes, then turn out onto rack (remove wax paper, if using) and cool completely, right side up. Just before serving, sprinkle tops lightly with confectioners sugar.

    Serving size: 3 cupcakes
    177 calories and 4 grams fat.

    Continue......